
A Painted Chest How-To!

Probably 6 or 7 years ago, I bought a chest for my dining room at the furniture market. It was the perfect size, shape and style. And inexpensive at wholesale.
But the finish was pretty bad.
It was a cheap veneer and looked like it. And the hardware was cheap too. I knew I would paint it, but it took me several years to get to it. I decided to use my favorite Annie Sloan Chalk Paint, and I had a picture from a magazine that I liked. How to make the chest look like the picture? I went over to the place that sells the paint and signed up for a one-on-one class with a local franchise owner, Anne Hughes DeCamps. It was $75 for an hour at that time, and well worth it. (She no longer reps the line.)
She took a sample cabinet door and painted it until it looked just like the picture. It was amazing. I took copious notes, and bought paint and came home to try my hand at it. I’ll show you what she did in my workshop, and then what I did at home. Here’s how it went…

Steps 1 and 2 - the first two coats.

Step 5

Step 3 and 4 - after the next two coats

Step 6

Final result after 7 coats.
It looks exactly like the picture I gave her, but I realized it was too green/orange for the room. Hmmmmmm…… I bought my supplies and came home and went to work.

Sorry for the odd lighting on these pictures. Here are pictures of the chest as it was bought with the original hardware.
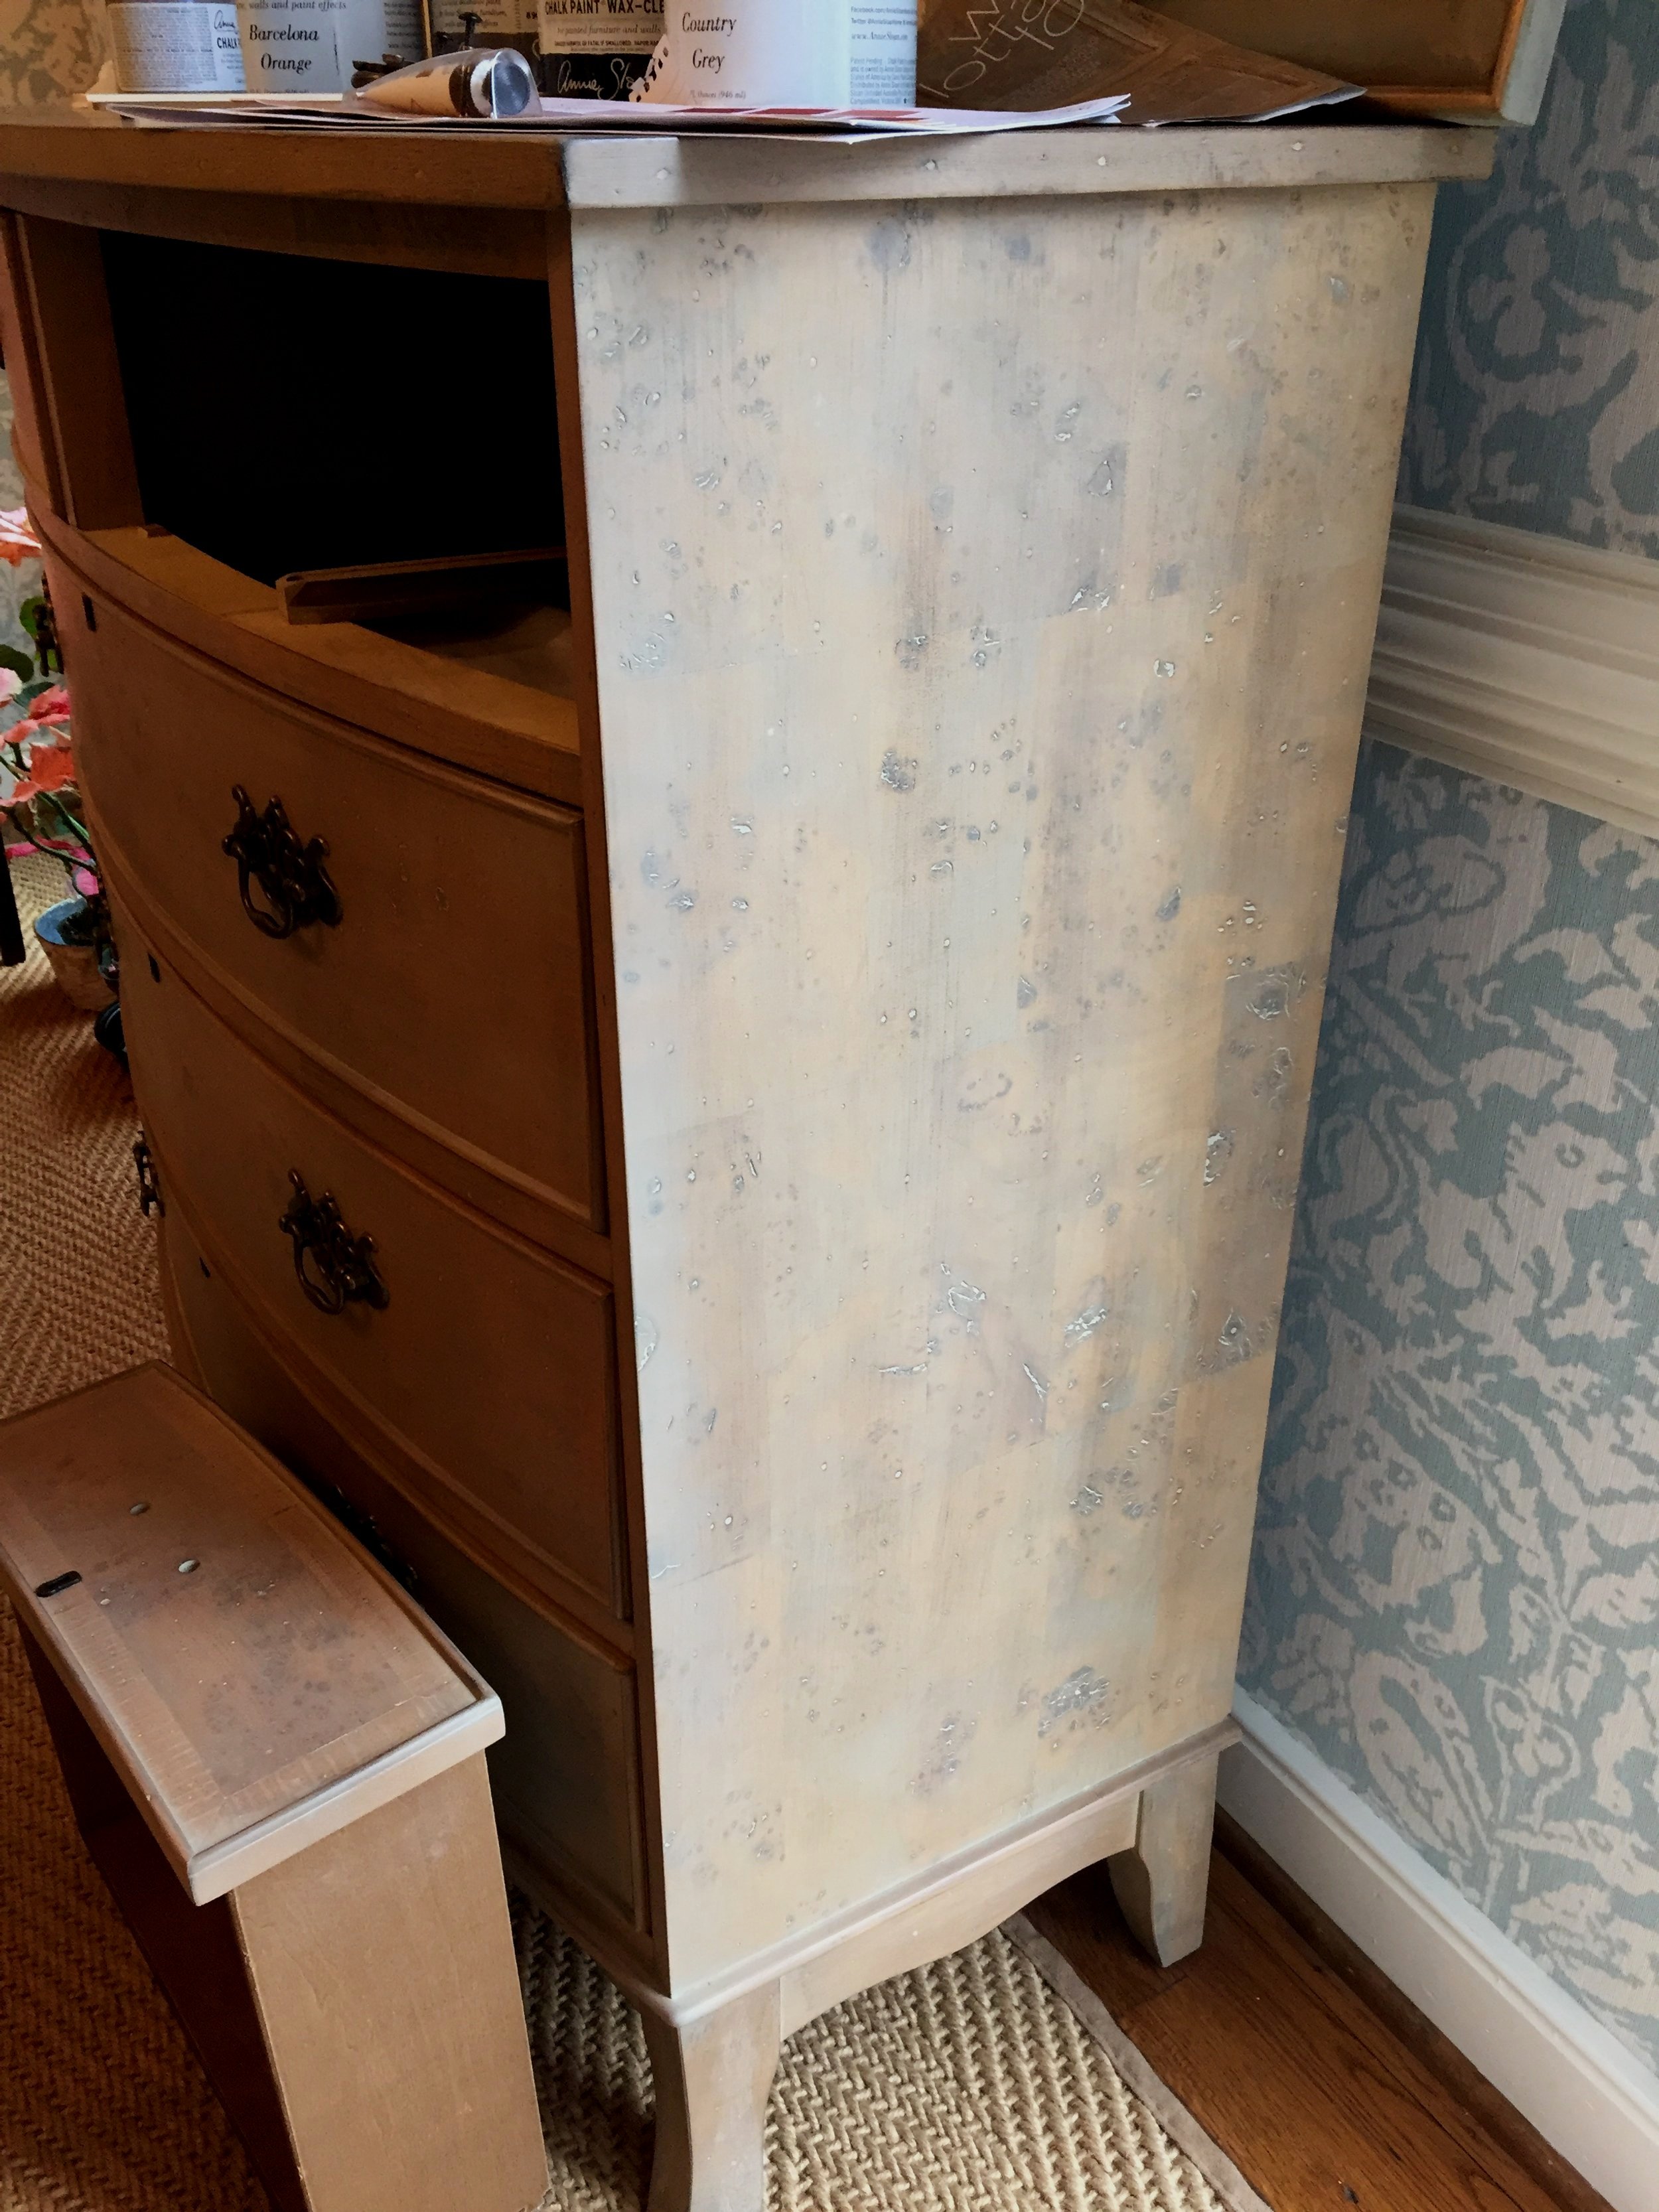
It was some kind of fake burled wood, in a grid pattern. Pretty bad, in my opinion.

And a close up of the beauty.

Aaand we’re ready to paint.
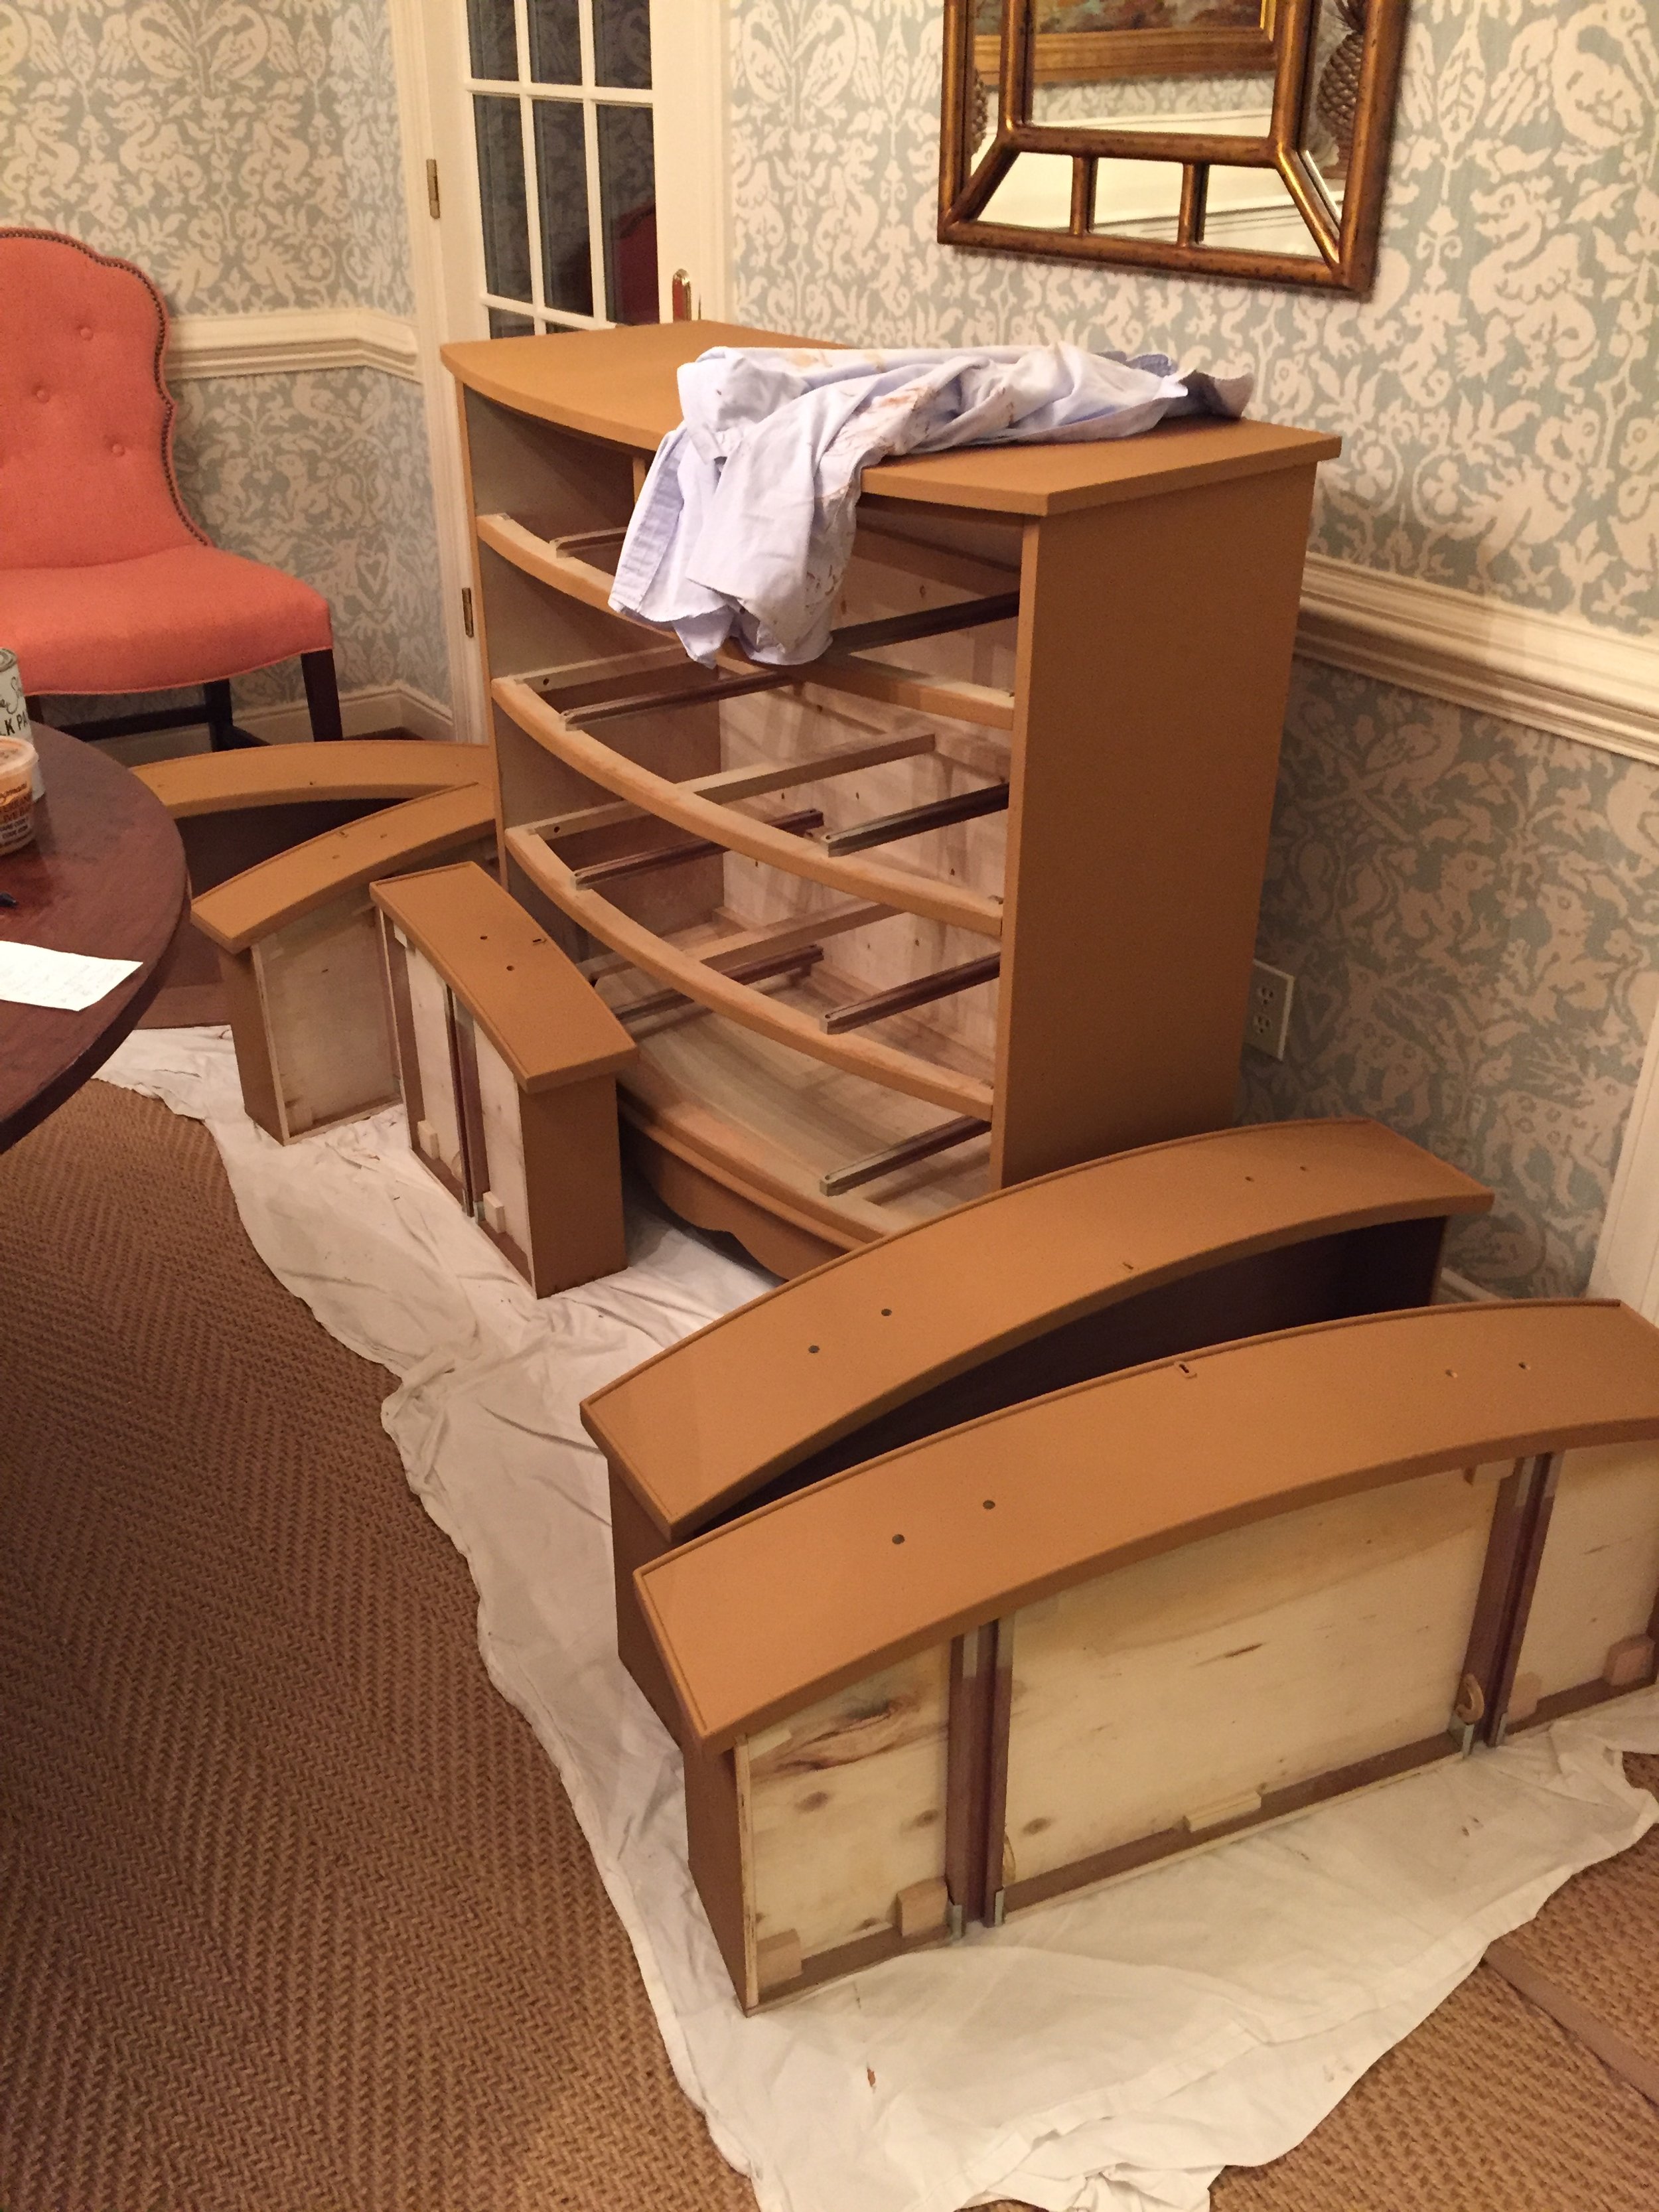
First Step
I painted he entire piece with a 1:1 mixture of Barcelona Orange ( a bright orange) and French Linen (a neutral khaki gray). I put two coats on for good coverage.

Step Two
I put a coat of Country Grey (a soft neutral) over the orange mix. I did not cover it fully - I let the orange peek through. I made sure to cover the orange corners, so it didn’t look like it was “trimmed” in orange.

Step Three
I made a mixture of one part Chateau Grey (a grey green) to one part Provence (here’s where I added blue to the sample green) to 1/2 part French Linen. I added a little water to thin it somewhat, and I did a light coverage of this gray/blue mixture. I still let the orange and the Country Grey come through. At this point it is very blotchy and streaky looking.


Step Four
In this next step, I ended up with a mixture of 2:2/3 (not quite 2:1), of 2 parts Country Grey to 2/3 part of Old White. I dabbed some heavy spots of this white mixture and then took a dry brush and brushed the extra off. Before it dries, you rub it with a wet rag to blend it better and if you have any mistakes or areas that look funny, you just sand them out after it dries. Now it’s looking softer and not as blotchy but we’re still not there yet.

Step Five
I applied tiny amounts of the orange mix and wiped or blotted them on in random places. After they dried, I sanded them out some, for a little more distressed look.

Step Six
The last addition of color was a grey blue wash on top of everything. This mixture ended up being 3 parts water, to 2 parts Provence, to 1 part French Linen, to 1 part Off White. This was done with a rag and was very watery.

Step Seven
I applied the Clear Wax to the piece and wiped off the excess. You don’t have to polish it, but I gave it a quick rub down. That was followed with a coat of Dark Wax on top. This was stippled on with a stippling brush, and the excess was wiped off with a clean rag. If you see any bad spots, you can sand them down and rewax.
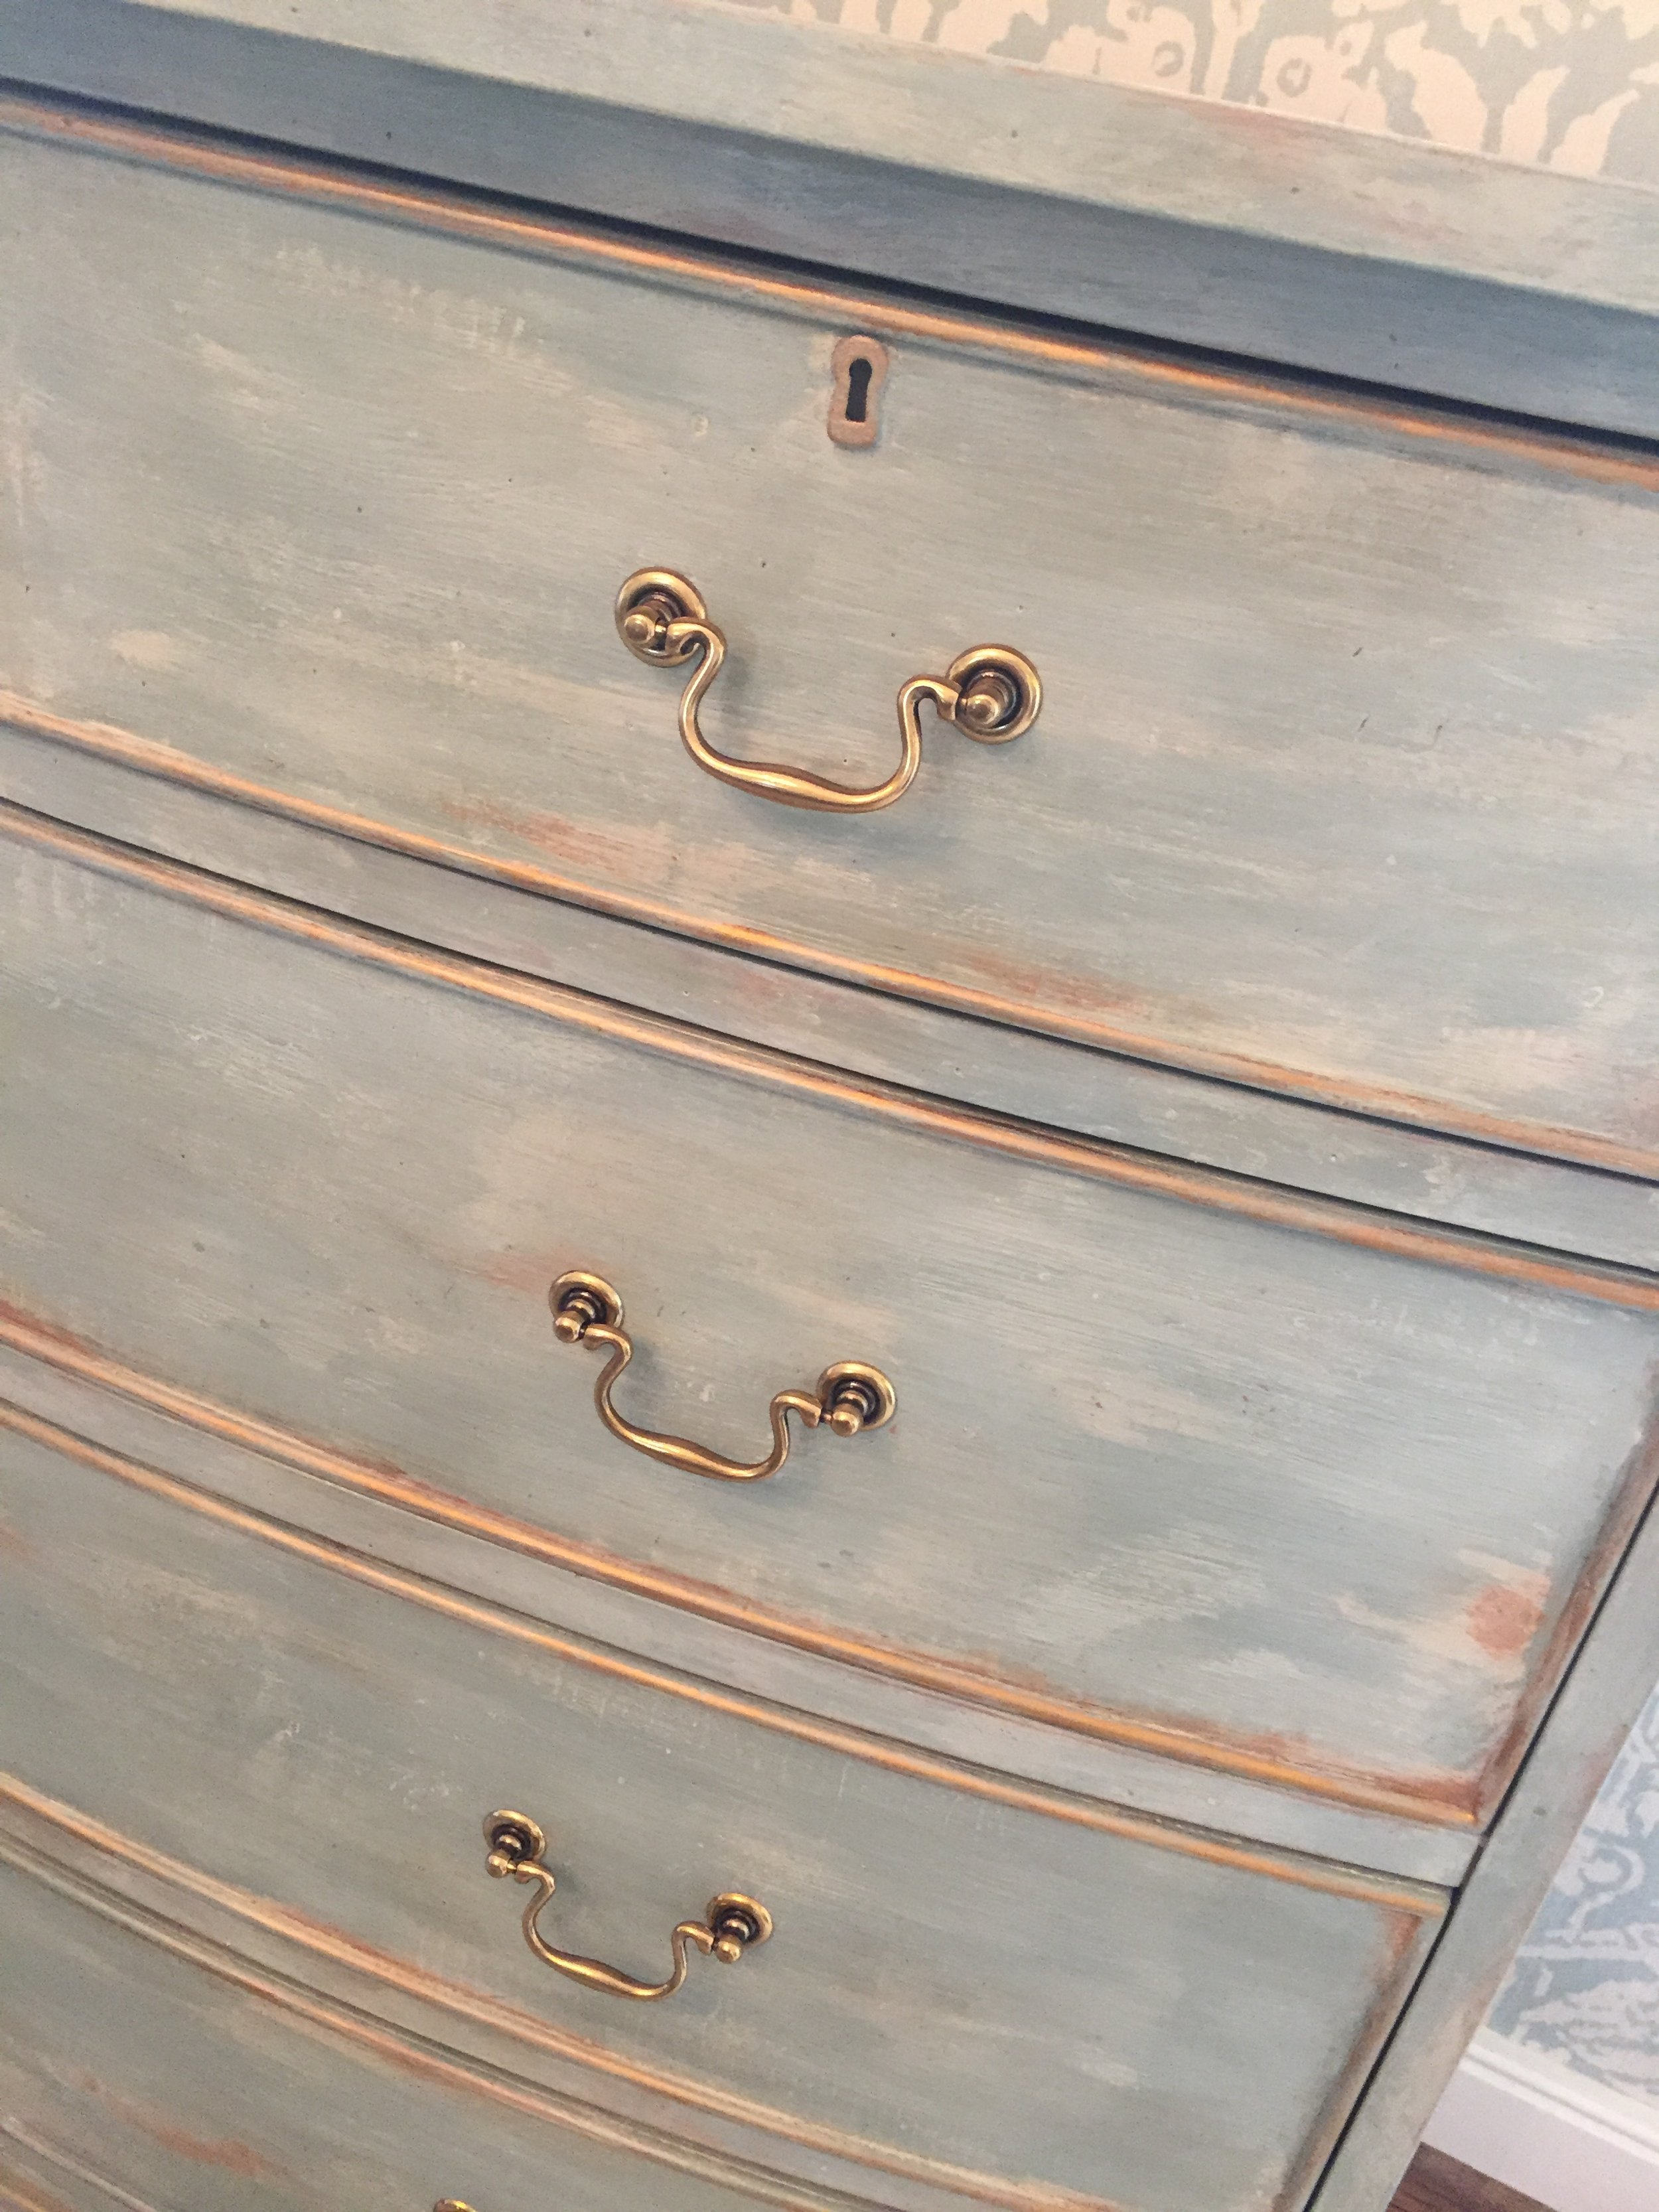
Final Step
I used the Gilding Wax and put it on with my finger. I did the raised edges of the drawer fronts and the small escutcheons. I ordered some simple brass bail pulls and there you have it. Two weeks later, I had a new piece of furniture.
Have you ever had success with painting a piece and repurposing it?